If you’ve ever dreamed of baking beautiful homemade bread but felt intimidated by yeast, kneading, or complicated techniques, this recipe is for you.
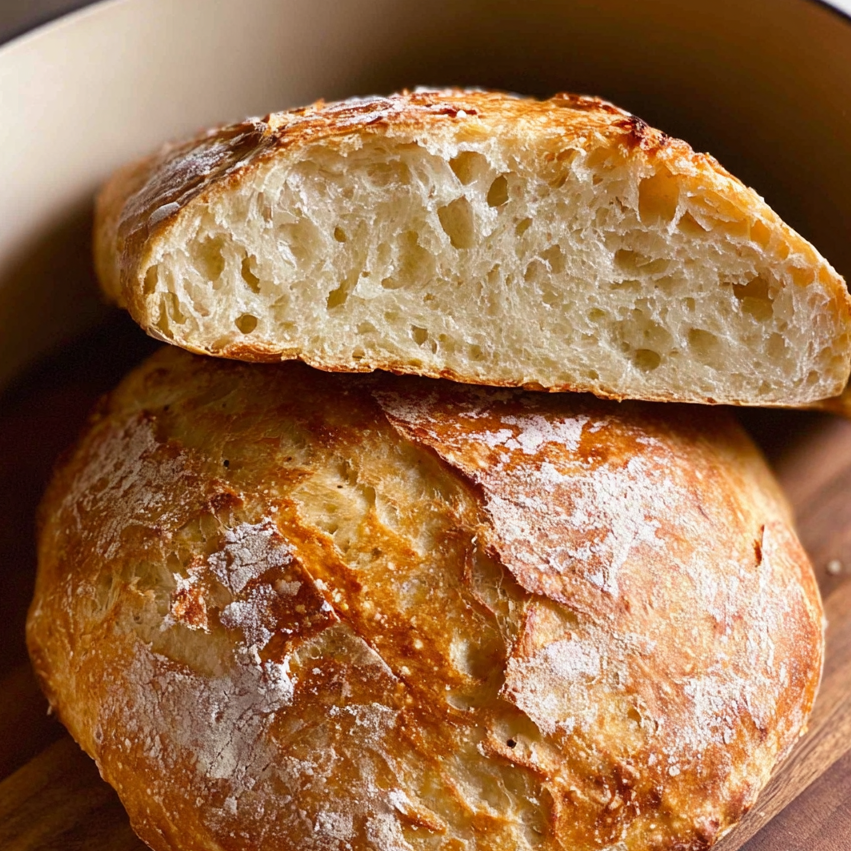
This easy no-knead yeast bread delivers everything you want in a bakery-style loaf: a thick golden crust, a chewy interior, and those beautiful rustic air pockets that make artisan bread so irresistible. Best of all, it takes just a few basic ingredients and almost no hands-on work.
No stand mixer. No kneading. No fancy shaping. Just mix, rise, bake, and enjoy.
It’s the kind of recipe beginners love because it’s so forgiving, and experienced bakers keep making because the results are genuinely incredible.
💛 Why You’ll Love This Bread Recipe
- 🍞 No kneading required
- ⏱️ Only a few minutes of active work
- 🧂 Made with just 4 basic ingredients
- ✨ Crispy crust and chewy artisan-style crumb
- 🥣 Very forgiving and beginner-friendly
- 🕒 Flexible rise time that works with your schedule
🧾 Ingredients
- 3 cups (450 g) flour, bread flour or all-purpose
- 2 tsp instant or rapid-rise yeast
- 1 1/2 tsp kosher salt
- 1 1/2 cups (375 ml) very warm water
For shaping:
- 1 1/2 tbsp flour, for dusting
👩🍳 How to Make This Easy Yeast Bread
1. Mix the Dough
In a large bowl, combine the flour, yeast, and salt.
Pour in the warm water and stir with a wooden spoon until all the flour is incorporated. The dough will look wet, sticky, and shaggy. That’s exactly what you want.
This is not a firm kneading dough. It should feel soft and loose, not dry and tight.
2. Let It Rise
Cover the bowl with plastic wrap or a plate and let it sit in a warm place for 2 to 3 hours.
The dough is ready when it has doubled in size, looks bubbly on top, and jiggles slightly when the bowl is moved.
If your kitchen is cool, the rise may take longer. If it’s warm, it may rise faster. This recipe is very forgiving.
3. Optional: Refrigerate for Better Flavor
Once the dough has risen, you can bake it right away.
Or, for deeper flavor, place the bowl in the fridge for 8 hours up to 3 days. This slow rest develops a richer, more complex taste.
Before baking chilled dough, let it sit at room temperature for about 45 to 60 minutes while the oven preheats.
4. Preheat the Oven and Pot
Place a Dutch oven with its lid into the oven and preheat to 450°F (230°C) for at least 30 minutes.
A hot oven and a hot pot help create a strong rise and crisp crust.
5. Shape the Dough
Dust your work surface lightly with flour and scrape the dough out of the bowl.
Sprinkle a little flour on top, then use a dough scraper, spatula, or large knife to fold the sides inward several times until it roughly forms a round shape.
Do not overwork it. This is meant to be rustic.
6. Transfer to Parchment
Place a large piece of parchment paper next to the dough.
Flip or slide the dough onto the paper so the smooth side faces up. Gently nudge it into a rough round shape.
Again, it doesn’t have to be perfect. In fact, a more rustic shape often creates extra crisp ridges on the crust.
7. Bake
Carefully remove the hot Dutch oven from the oven.
Using the parchment paper, lift the dough and place it into the pot. Cover with the lid.
Bake for 30 minutes covered, then remove the lid and bake for another 12 minutes, or until the bread is deep golden brown and crisp.
8. Cool Before Slicing
Transfer the bread to a rack and let it cool for at least 10 minutes before slicing.
This helps the inside finish setting and prevents the crumb from seeming gummy.
🔥 Why This Recipe Works
This bread works so beautifully because the dough is intentionally wet and sticky.
A loose dough rises more easily and creates those airy artisan holes inside. Since the dough is soft, it doesn’t need kneading to become light and beautiful.
The hot Dutch oven traps steam, which helps the loaf rise before the crust hardens. That’s what gives the bread its dramatic shape, chewy crumb, and crunchy crust.
It’s simple science with a seriously delicious payoff.
🍞 Bread Flour vs. All-Purpose Flour
Bread flour gives the best artisan-style result because it has more protein, which helps create more gluten. That means:
- better chew
- a stronger rise
- bigger holes in the crumb
- a more bakery-style texture
That said, all-purpose flour still works very well, and the bread will still be delicious.
🧊 Make-Ahead and Storage
Make Ahead
After the first rise, refrigerate the dough for up to 3 days. The longer it rests, the more flavor it develops.
Storage
Store baked bread in an airtight container or zip-top bag for up to 2 days at room temperature.
After that, it’s still good, but best toasted or warmed before serving.
Freezing
Freeze the baked loaf for up to 3 months. Let it cool completely before freezing.
🍽️ Ways to Enjoy This Bread
This bread is as versatile as any bakery loaf.
Serve it warm with butter, make sandwiches, toast it for breakfast, turn it into garlic bread, pair it with soups and stews, or use it for bruschetta and grilled cheese.
Once you make it once, you’ll find yourself reaching for this recipe again and again.
💡 Tips for Success
- The dough should be sticky and wet, not dry
- If it feels too dry, add a little water
- If it feels too wet, add a touch of flour
- Let the dough rise until it’s doubled and bubbly, not just until the timer ends
- Always preheat the Dutch oven for the best crust
- Don’t skip the cooling time before slicing
🥘 No Dutch Oven? No Problem
You can still make this bread without a Dutch oven.
Place a metal pan filled with boiling water in the oven to create steam, and bake the dough on a parchment-lined baking tray. The steam helps mimic the effect of the covered pot and still gives you a crusty loaf.
⏱️ Recipe Details
- Prep Time: 5 minutes
- Cook Time: 40 minutes
- Rise Time: 2 hours
- Total Time: 2 hours 45 minutes
- Yield: 10–12 slices
❓FAQs
Can I use active dry yeast instead of instant yeast?
Yes. Just dissolve it in the warm water first, then mix with the flour and salt.
Can I refrigerate the dough overnight?
Absolutely. It improves the flavor and makes the bread even better.
Why is my dough so sticky?
Because it’s supposed to be. A wet dough is the key to the airy, artisan-style texture.
Can I use whole wheat flour?
Yes, but you may need to slightly reduce the flour amount at first and adjust as needed since whole wheat absorbs more water.