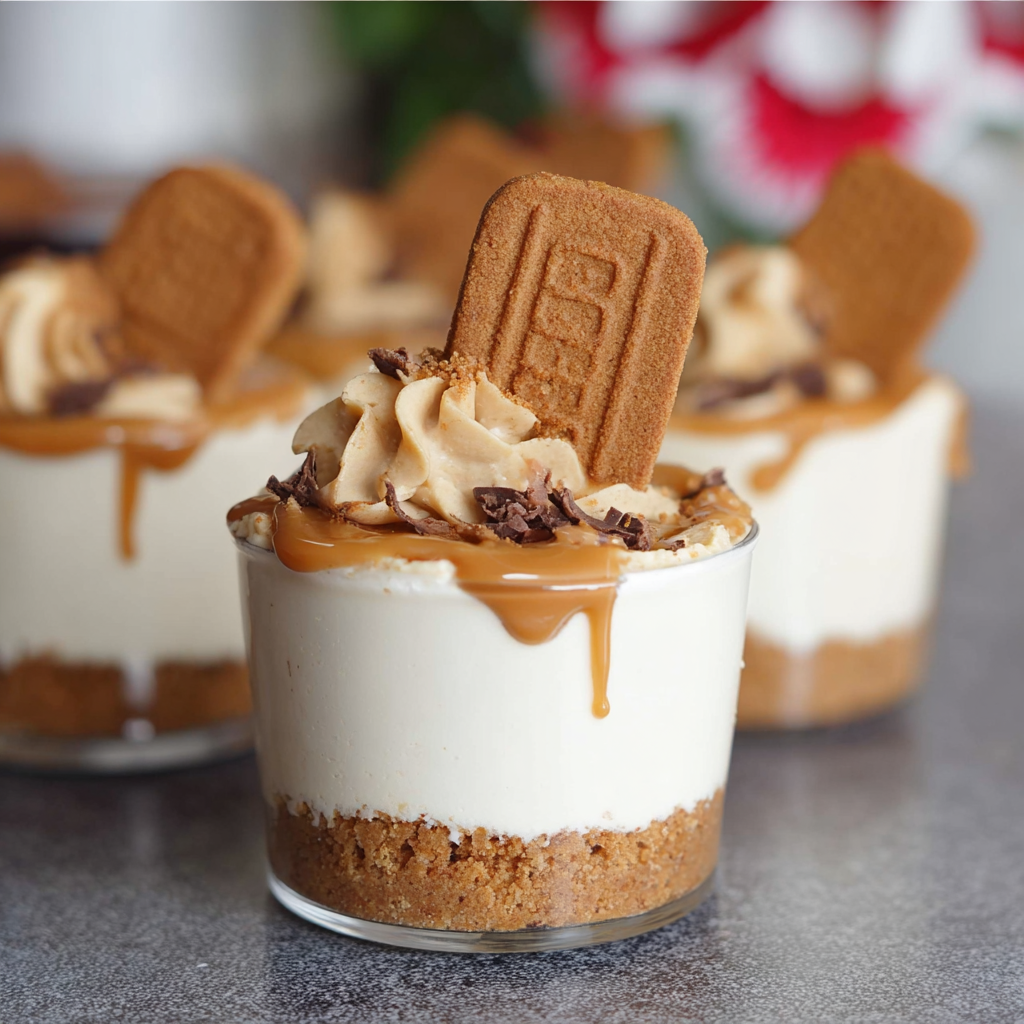
If you’re a fan of rich, caramelized cookie flavors, these No-Bake Lotus Biscoff Cheesecake Cups are about to become your new favorite dessert. Featuring a buttery Biscoff biscuit base, a silky smooth cookie butter cheesecake filling, and a luscious Biscoff topping, every bite is pure indulgence.
These mini cheesecake cups are not only incredibly delicious but also beautifully presented in individual servings—perfect for parties, gatherings, or simply treating yourself!
⏱️ Recipe Info
- Prep Time: 15 minutes
- Chill Time: 4 hours
- Total Time: 4 hours 15 minutes
- Servings: 8
- Category: Dessert
- Cuisine: American
- Difficulty: Easy (No-bake)
💛 Why You’ll Love This Recipe
- No-bake & effortless: No oven required—just mix, assemble, and chill
- Ultra creamy texture: Smooth, melt-in-your-mouth cheesecake filling
- Rich Biscoff flavor: Made with both Biscoff biscuits and cookie butter
- Perfect for occasions: Elegant individual cups for parties or celebrations
🛒 Ingredients
🍪 Crust
- 10–15 Lotus Biscoff biscuits, crushed
🧀 Cheesecake Filling
- 8 oz cream cheese, softened
- 1 1/4 cups heavy cream (cold)
- 1 teaspoon vanilla extract
- 1/2 cup powdered sugar
- 3/4 cup Lotus Biscoff spread
✨ Topping
- 1/2 cup Lotus Biscoff spread, melted
- 6 Lotus Biscoff biscuits, crushed
👩🍳 Instructions
🍪 Prepare the Crust
- Crush the Biscoff biscuits into fine crumbs using a food processor or by hand.
- Divide evenly between 8 serving cups (about 1 tablespoon per cup) and press lightly to form the base.
🧀 Make the Cheesecake Filling
- In a large bowl, beat the softened cream cheese until smooth and creamy.
- Add the Biscoff spread and mix until fully combined.
- In a separate bowl, whip the heavy cream, vanilla, and powdered sugar until soft peaks form.
- Gently fold the whipped cream into the cream cheese mixture until smooth and fluffy.
🧁 Assemble the Cups
- Transfer the filling into a piping bag (or spoon it in) and fill each cup with about 1/4 cup of the mixture.
- Melt the Biscoff spread in the microwave for about 20 seconds until smooth.
- Spoon or pipe a thin layer of melted Biscoff over each cup.
- Sprinkle crushed Biscoff biscuits on top for extra texture and flavor.
❄️ Chill & Serve
- Refrigerate for at least 4 hours (or overnight) until fully set.
- Serve chilled and enjoy every creamy, caramel-spiced bite!
💡 Pro Tips
- Always use room temperature cream cheese for a smooth filling
- Chill for at least 6 hours for the best texture and flavor
- Use a piping bag for neat, bakery-style presentation
- Prepare a day ahead for even better taste
🔄 Variations
- Add a layer of chocolate ganache for extra indulgence
- Top with whipped cream or fresh berries
- Swap Biscoff with speculoos or graham crackers if needed
❓ FAQs
How do I store these cheesecake cups?
Keep them covered in the refrigerator for up to 5 days.
Why didn’t my cheesecake set?
It likely needs more chilling time—allow at least 4–6 hours to firm up properly.
Can I freeze them?
Yes! Freeze for up to 1 month and thaw in the fridge before serving.
🍽️ Serving Suggestions
- Perfect for: birthdays, holidays, dinner parties
- Serve with: coffee, espresso, or caramel lattes
- Ideal as a make-ahead dessert