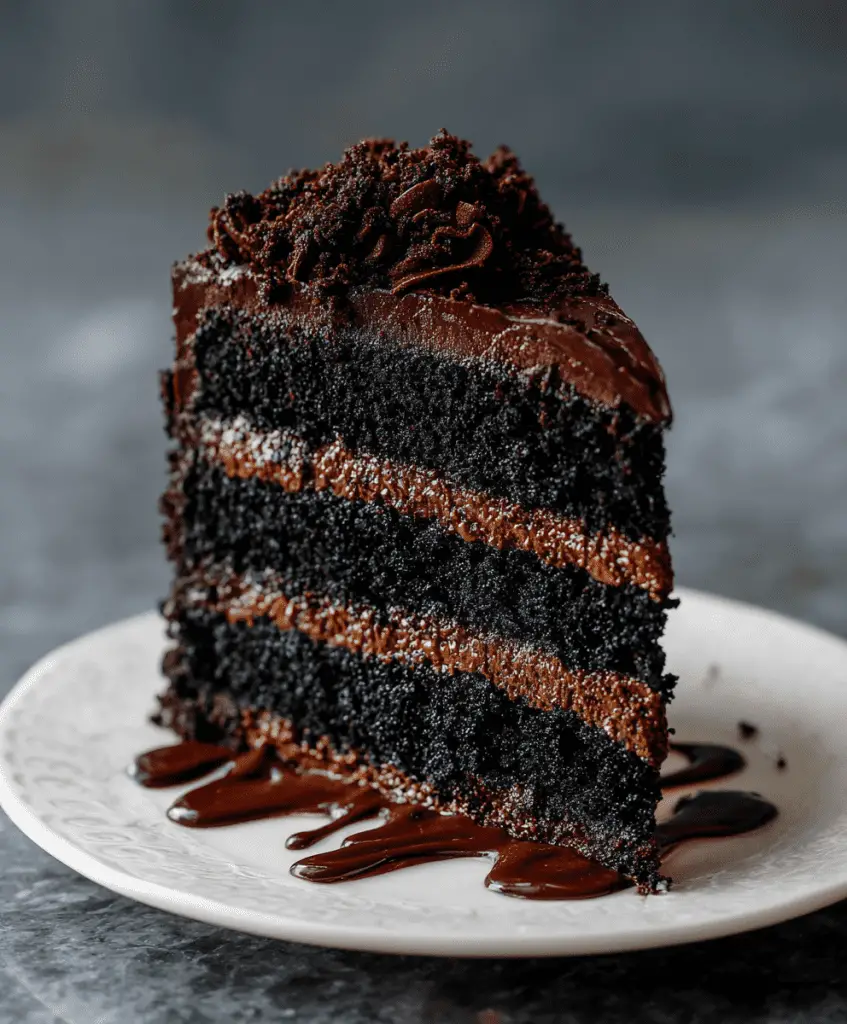
Decadent, dark, and utterly irresistible—Brooklyn Blackout Cake is a chocolate lover’s dream. With layers of ultra-moist chocolate cake, a thick chocolate pudding filling, and a rich frosting topped with chocolate cake crumbs, this iconic dessert is as indulgent as it gets.
Originating in Brooklyn, New York, this cake has a wartime past and a legacy of bold flavor. Let’s dive into the history, ingredients, and step-by-step process of making this unforgettable chocolate cake at home.
The Story Behind the Name
The Brooklyn Blackout Cake was born during World War II, inspired by the mandatory blackout drills in New York City to protect the area from potential air raids. A Brooklyn-based bakery named Ebinger’s created the cake, and it quickly became a neighborhood favorite—thanks to its intense chocolate flavor and crumb-covered exterior that echoed the blackout theme.
Though Ebinger’s is long gone, the cake lives on as a beloved classic.
What Makes a Brooklyn Blackout Cake?
Unlike your typical chocolate cake, this dessert stands out with:
- Moist, rich chocolate layers
- A thick, homemade chocolate pudding filling
- A glossy chocolate frosting
- Cake crumbs pressed onto the sides and top
Ingredients You’ll Need
For the Cake
- 1 ¾ cups all-purpose flour
- 2 cups granulated sugar
- ¾ cup unsweetened Dutch-process cocoa powder
- 2 tsp baking soda
- 1 tsp baking powder
- 1 tsp salt
- 1 cup buttermilk (or whole milk)
- ½ cup vegetable oil
- 2 large eggs
- 1 tsp vanilla extract
- 1 cup hot brewed coffee
For the Pudding Filling
- 2 tbsp Dutch-process cocoa powder
- 1 cup boiling water or hot coffee
- 6 tbsp sugar
- 1 oz bittersweet chocolate, chopped
- ¼ tsp salt
- 2 tbsp cornstarch
- 2 tbsp cold water
- 1 tsp vanilla extract
- 1 tbsp butter
For the Frosting
- ¾ cup unsalted butter
- 12 oz semisweet chocolate, finely chopped
- ½ cup hot water
- 1 tbsp corn syrup
- 1 tbsp vanilla extract
Step-by-Step Instructions
1. Bake the Cake Layers
- Preheat oven to 350°F (175°C). Grease and line two 8-inch cake pans with parchment paper.
- In a large bowl, whisk together all dry ingredients.
- In another bowl, whisk wet ingredients except coffee.
- Gradually mix wet into dry, then stir in the hot coffee. The batter will be thin—this is normal.
- Pour a small amount into two cupcake liners (for cake crumbs) and divide the rest between the cake pans.
- Bake cakes for 35 minutes. Bake cupcakes for an additional 15 minutes.
- Cool layers completely before removing from pans.
2. Make the Chocolate Pudding
- In a saucepan, whisk cocoa powder and boiling water over medium heat.
- Add sugar, chopped chocolate, and salt. Stir until melted.
- Whisk cornstarch with cold water and add to the pan.
- Bring to a boil, stirring constantly. Boil for 1 minute until thickened.
- Remove from heat, stir in vanilla and butter, and chill until set.
3. Prepare the Frosting
- Melt butter and chocolate in a microwave-safe bowl (or saucepan). Stir until smooth.
- Whisk in hot water, corn syrup, and vanilla.
- Chill for 20–30 minutes until it reaches a spreadable consistency.
4. Assemble the Cake
- Pulse the cupcakes in a food processor to create fine crumbs. Set aside.
- Place one cake layer (flat-side up) on a serving plate.
- Spread a generous layer of pudding on top.
- Add the second cake layer (also flat-side up).
- Lightly spread pudding around the sides of the cake and press the cake crumbs into it by hand. (It’ll get a bit messy!)
- Frost the top with your chocolate frosting.
- Decorate with more crumbs—either on the edges or fully covering the top.
Tips for Success
- Use quality chocolate for deeper, richer flavor.
- Let the cake fully cool before assembling to prevent melting.
- Chill the finished cake for at least 1 hour before slicing.
- For extra flair, top with chocolate curls or a dusting of cocoa powder.
Variations to Try
- Add raspberry jam between layers for a fruity contrast.
- Swap pudding for salted caramel or peanut butter filling.
- Add chopped nuts for a crunchy twist.
Serving Suggestions
Serve cold or at room temperature with:
- A dollop of whipped cream
- A scoop of vanilla ice cream
- Fresh berries on the side
Storage Tips
- Store in an airtight container in the fridge for up to 5 days.
- Bring to room temperature before serving for best texture.
- Freeze assembled cake for up to 3 months. Thaw overnight in the refrigerator.
FAQs
Can I make this cake ahead of time?
Yes! You can bake the cake layers and make the filling and frosting a day or two in advance. Assemble just before serving.
Can I freeze the cake?
Absolutely. Wrap tightly and freeze for up to 3 months. Thaw overnight in the fridge.
Can I substitute ingredients like milk or oil?
Yes, you can use almond milk or coconut oil as alternatives, though it may slightly change the flavor and texture.
How can I make the cake more moist?
Adding hot coffee and not overbaking are key to a tender, moist crumb.
Final Thoughts
Brooklyn Blackout Cake is more than just a dessert—it’s a piece of culinary history wrapped in chocolatey richness. Whether you’re baking it for a special occasion or a serious chocolate craving, this cake is guaranteed to impress.
With its pudding layers, rich frosting, and signature crumb coating, it’s a chocolate masterpiece that stands the test of time.