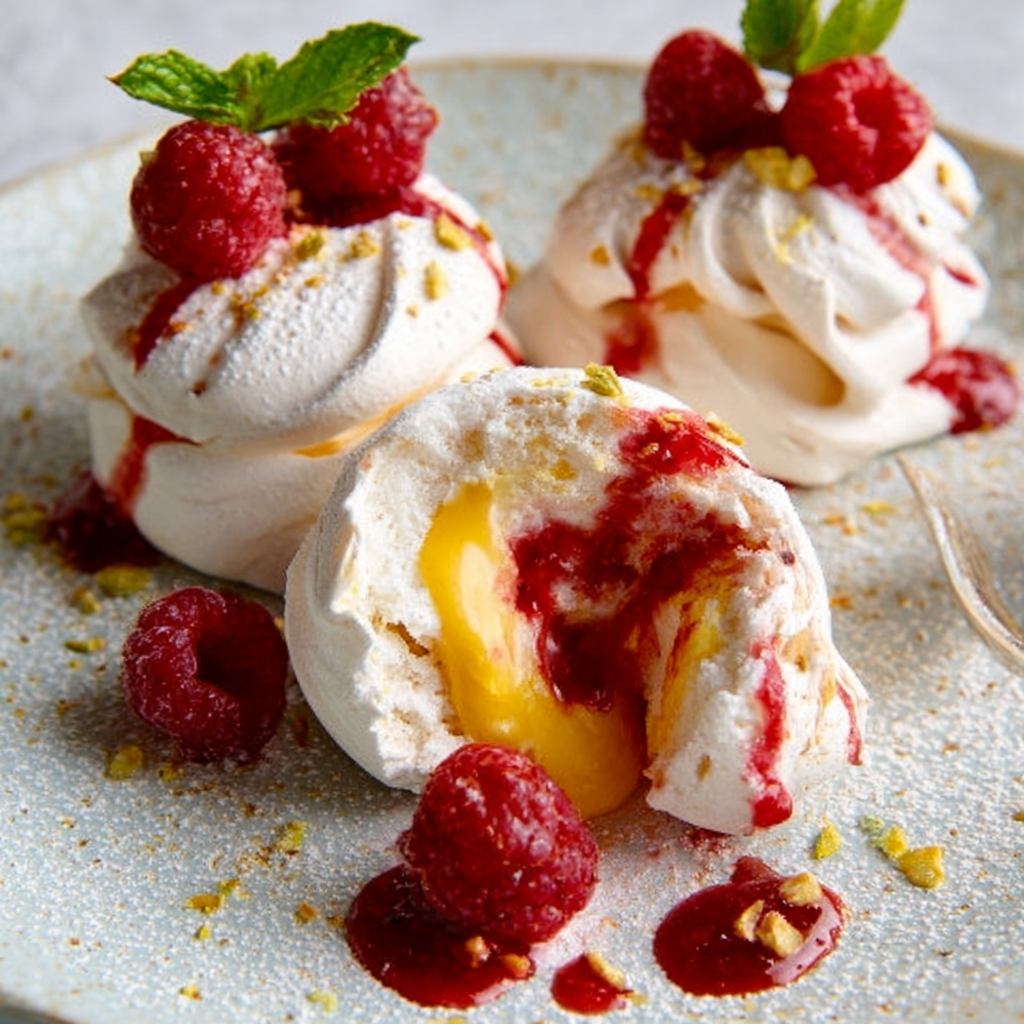
These Pavlova Bombs are playful, impressive little desserts that look simple on the outside but hide a delicious surprise inside. Each crisp meringue sphere is filled with tangy lemon curd, vibrant raspberry coulis, and fluffy whipped cream.
At first glance they appear like innocent mini pavlovas. But once you cut into them, the colorful fillings burst out dramatically—creating a dessert that is as fun to eat as it is beautiful to serve.
Despite their impressive look, Pavlova Bombs are surprisingly easy to make. Simply bake small pavlova shells, poke a hole in the base, pipe in your fillings, and seal it with cream.
A Fun Twist on Classic Pavlova
Pavlova is one of the most iconic desserts in Australia and New Zealand. Traditionally served as a large crisp meringue topped with whipped cream and fruit, it’s especially popular during summer and holiday celebrations.
Over the years, many variations have appeared:
- classic pavlova
- mini pavlovas
- pavlova wreaths
- pavlova Christmas trees
But Pavlova Bombs take the concept to a whole new level.
Inspired by a dessert served at a restaurant, this version hides the fruit and cream inside the pavlova shell, creating a dramatic moment when the dessert is cut open.
What Pavlova Bombs Taste Like
The flavor combination is absolutely incredible.
Each bite delivers several layers of texture and flavor:
- a crisp meringue shell
- a soft marshmallow-like center
- bright raspberry coulis for fruity acidity
- silky lemon curd with a gentle citrus tang
- light whipped cream to balance the sweetness
The contrast between crunchy meringue and creamy fillings makes every bite irresistible.
And of course—can it really be a pavlova without whipped cream?
Endless Filling Possibilities
One of the best things about Pavlova Bombs is how customizable they are.
Any filling that can be piped or poured through a small hole will work beautifully.
Some delicious alternatives include:
- passionfruit pulp
- mango puree
- chopped strawberries or berries
- chocolate sauce
- salted caramel sauce
- candied nuts or praline
- caramelized fruit
- chopped cherries
This makes them perfect for experimenting with seasonal flavors.
Ingredients Overview
The recipe has three main components:
- Pavlova shells
- Fillings
- Whipped cream and garnishes
Pavlova Shell Ingredients
The pavlova shells are made with only a few simple ingredients:
- egg whites
- caster sugar (superfine sugar)
- cornstarch
- white vinegar
The sugar creates the crisp outer shell while the cornstarch and vinegar stabilize the meringue and help produce that soft marshmallow center.
Why the Sugar Amount Matters
Pavlova requires the right ratio of sugar to egg whites.
Reducing the sugar might seem tempting, but it will affect the structure of the meringue. Without enough sugar, the shells become fragile and may collapse or weep.
The balance of sweetness works perfectly once paired with fruit and cream.
Filling Ingredients
The classic filling combination used here includes:
- raspberry coulis
- lemon curd
- whipped cream
These flavors balance the sweetness of the pavlova beautifully.
The lemon curd also conveniently uses the egg yolks leftover from the meringue, making the recipe very efficient.
How to Make Pavlova Bomb Shells
Mini pavlovas are actually easier to handle than a large pavlova.
Step 1 – Prepare the egg whites
Separate the eggs while they are cold, as this makes the process easier.
Measure about 80 ml (1/3 cup) of egg whites, which equals roughly 3–4 eggs.
Allow the whites to sit at room temperature for about 15 minutes before whipping.
Step 2 – Whip the meringue
Beat the egg whites until soft peaks form.
Gradually add the sugar while continuing to beat. This ensures the sugar dissolves properly and the meringue remains airy.
Continue beating until the mixture becomes thick, glossy, and smooth, with no sugar grains remaining.
Add the vinegar and cornstarch, then mix briefly to combine.
Step 3 – Shape the pavlova domes
Transfer the meringue to a piping bag or spoon it onto a lined baking tray.
Form five dome-shaped mounds, slightly taller than they are wide.
They will spread slightly during baking, so the height helps maintain the rounded shape.
Step 4 – Bake
Bake the pavlovas at 110°C / 225°F for about 1 hour and 30 minutes, until the outside is dry and crisp.
The base should feel firm and not sticky.
Step 5 – Cool slowly
Turn off the oven and leave the pavlovas inside to cool for at least 3 hours, or even overnight.
This gradual cooling process prevents cracks and keeps the meringue stable.
Preparing the Fillings
While the pavlovas bake and cool, you can prepare the fillings.
Raspberry coulis
A simple berry sauce made by blending raspberries with sugar and straining out the seeds.
Lemon curd
A smooth citrus custard made from lemon juice, egg yolks, sugar, and butter.
Both fillings should be fully chilled before assembling the pavlovas.
How to Fill Pavlova Bombs
This is the most fun part of the recipe.
Step 1 – Create the opening
Turn the pavlova upside down and carefully cut a small hole in the base.
Using the base instead of the top prevents the shell from collapsing.
Step 2 – Make room inside
Insert a chopstick or small spoon through the hole and gently move the marshmallow center aside to create space for the fillings.
Step 3 – Fill the pavlova
Pipe the fillings inside in layers:
- raspberry coulis
- lemon curd
Be careful not to overfill, as too much liquid can weaken the shell.
Step 4 – Seal with whipped cream
Pipe whipped cream into the hole to seal it.
Then flip the pavlova upright.
Decorating and Serving
Pipe a small swirl of cream onto the serving plate and place the pavlova on top.
Decorate with:
- fresh raspberries
- chopped pistachios
- mint leaves
- a dusting of powdered sugar
Serve immediately for the best texture.
The Fun Part – Smash!
The real magic happens when you cut into the pavlova.
The crisp shell cracks open and the colorful fillings spill out, creating a beautiful and delicious dessert moment.
Encourage guests to break into their Pavlova Bombs so every bite includes meringue, fruit, cream, and curd.
What If a Pavlova Cracks?
Don’t worry—pavlova can be delicate.
If a shell cracks during assembly, simply hide the crack with whipped cream.
And if one breaks completely, turn it into an Eton Mess by layering the broken meringue with cream and fruit in a glass.
It’s a classic dessert and just as delicious.
Storage Tips
The pavlova shells can be prepared ahead of time.
- Store in an airtight container for up to 24 hours
- Fill them just before serving to prevent softening
Once filled, they should be served immediately.
Final Thoughts
Pavlova Bombs are a creative and fun twist on a classic dessert.
They combine everything people love about pavlova—crisp meringue, creamy filling, and fresh fruit—but with an unexpected surprise hidden inside.