Making your own Sourdough Starter at home is easier than you might think! With just flour, water, patience, and a little daily feeding, you can create a bubbly, active starter perfect for homemade sourdough bread, pancakes, pretzels, crackers, cinnamon rolls, and so much more. While sourdough may seem intimidating at first, this simple method keeps the process approachable and beginner-friendly while still delivering incredible flavor and texture.
Once your starter becomes active and bubbly, you’ll have a living ingredient you can keep for years and use again and again for delicious homemade baking!
Why You’ll Love This Sourdough Starter Method
- Only 2 ingredients needed
- Beginner-friendly and easy to follow
- No fancy equipment required
- Creates flavorful homemade sourdough baked goods
- Can be maintained for years
- Perfect foundation for bread, pancakes, pretzels, and more
What Is A Sourdough Starter?
A sourdough starter is a fermented mixture of flour and water filled with natural wild yeast and beneficial bacteria. Over time, the microorganisms develop naturally and create the rise, texture, and signature tangy flavor sourdough is known for.
Instead of commercial yeast, sourdough baking relies on this active starter to help bread and baked goods rise naturally.
Supplies You’ll Need
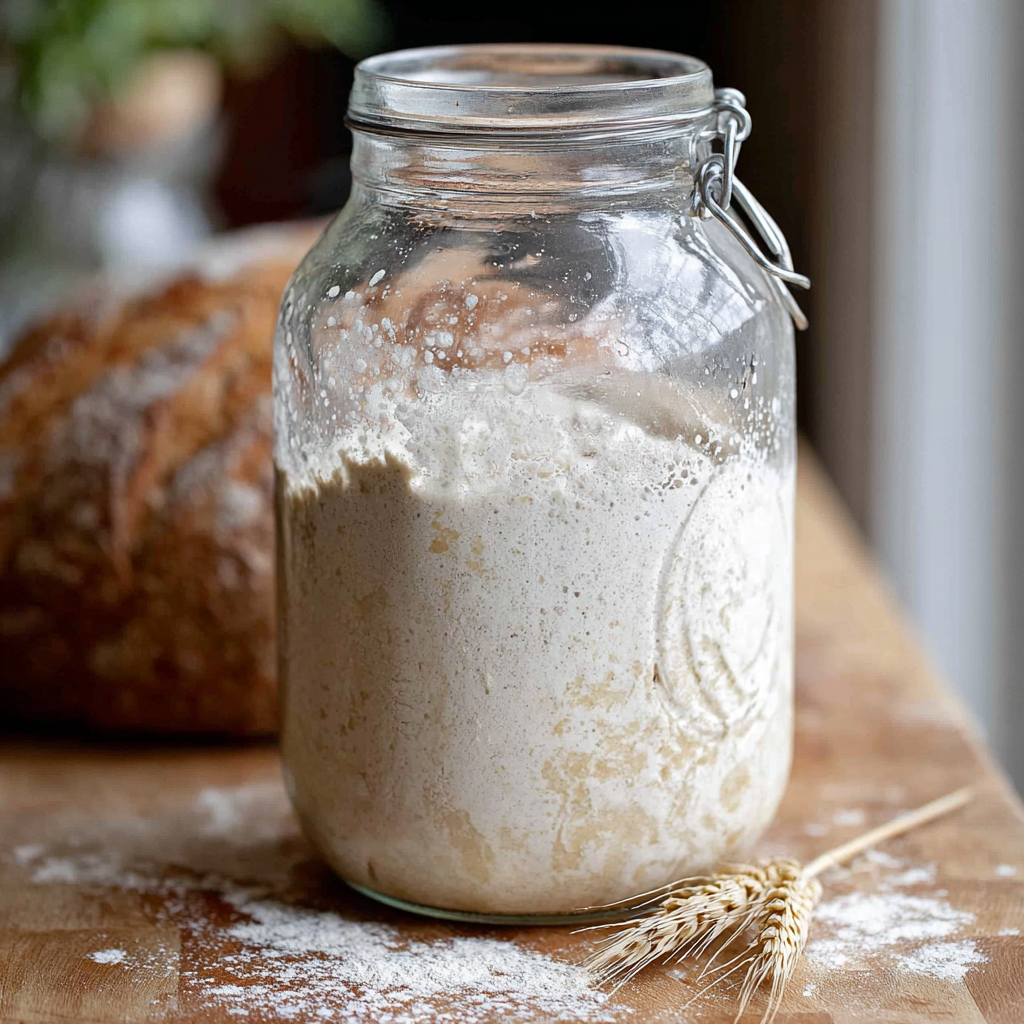
Glass Jar
A quart-sized glass jar works best. Avoid metal containers whenever possible.
Lid Or Cover
A loose lid, paper towel, or cloth secured with a rubber band allows airflow while protecting the starter.
Wooden Spoon
Many bakers prefer using wood or silicone instead of metal utensils.
Ingredients & Why They Matter
Flour
Unbleached all-purpose flour and whole wheat flour work beautifully for beginners. You can also experiment with:
- Bread flour
- Rye flour
- Einkorn flour
- Whole wheat flour
Whole grain flours often help starters activate more quickly because they contain more natural yeast.
Water
Filtered or purified water is ideal. Chlorinated tap water may slow or damage the natural fermentation process.
If using tap water:
- Let it sit uncovered for 24 hours before using
OR - Use bottled water
How To Make A Sourdough Starter
The process is surprisingly simple. The key is consistency and patience.
Basic Measurements To Remember
- ½ cup flour
- ¼ to ⅓ cup water
These same measurements are used repeatedly during the feeding process.
Day-By-Day Sourdough Starter Guide
Day 1 — Start The Starter
- Add:
- ½ cup flour
- ¼ cup water
- Stir until a thick pancake-batter consistency forms.
- Cover loosely with a paper towel or lid.
- Let sit at room temperature for 24 hours in a warm spot.
Ideal temperature: about 70°F.
Day 2 — First Feeding
After 24 hours:
- Check for bubbles
If bubbles appear:
- Add:
- ½ cup flour
- ¼ to ⅓ cup water
- Stir thoroughly.
- Rest another 24 hours.
If no bubbles appear:
- Stir once and wait another day. This is completely normal.
Day 3 — Second Feeding
- Remove half of the starter.
- Add:
- ½ cup flour
- ¼ to ⅓ cup water
- Stir well and let rest 24 hours.
At this point, you should begin noticing more activity and a slightly tangy aroma.
Days 4–6 — Continue Feedings
Continue removing half and feeding once or twice daily.
Your starter is ready when:
- It consistently bubbles
- Doubles in size within 6–8 hours after feeding
- Smells pleasantly tangy and yeasty
How To Know Your Starter Is Ready
A mature starter should:
- Be bubbly throughout
- Rise predictably after feeding
- Smell pleasantly sour, not rotten
- Pass the “float test” (a spoonful floats in water)
Once active, it’s ready for baking!
How To Store A Sourdough Starter
Refrigerator Storage
Once active, store the starter in the refrigerator with a loose lid.
Feed it:
- About once per week
Before baking:
- Remove from refrigerator
- Feed the starter
- Let it sit at room temperature for 12–24 hours until bubbly and active again
Signs Your Starter Has Gone Bad
Healthy sourdough starters smell tangy and fermented.
Throw it away if you notice:
- Pink or orange color
- Mold
- Rotten or foul smell
- Fuzzy growth
Don’t worry—starting over is easy!
What To Do With Sourdough Discard
The “discard” is the portion removed before feeding your starter. Don’t throw it away! It can be used in so many delicious recipes.
Delicious Sourdough Discard Ideas
- Pancakes
- Pretzels
- Crackers
- Brownies
- Cinnamon rolls
- English muffins
- Banana bread
- Chocolate chip cookies
- Pasta dough
The discard adds incredible flavor even before the starter becomes fully mature.
Easy Sourdough Starter Recipe
Prep Time
10 minutes
Feeding & Resting Time
6 days
Total Time
6 days 10 minutes
Ingredients
- ½ cup whole wheat flour or unbleached all-purpose flour
- ¼–⅓ cup water (preferably filtered, about 75°F)
Supplies
- 1 glass jar (about 32 ounces)
- Paper towel or loose lid
- Rubber band
Instructions
Day 1
- Combine flour and water in the jar.
- Stir until smooth.
- Cover loosely and let sit 24 hours.
Day 2
- Check for bubbles.
- If bubbles appear, feed with:
- ½ cup flour
- ¼–⅓ cup water
- Stir and rest another 24 hours.
Day 3
- Remove half the starter.
- Feed with:
- ½ cup flour
- ¼–⅓ cup water
- Stir thoroughly and rest 24 hours.
Days 4–6
- Continue discarding half before feeding.
- Feed once or twice daily.
- Continue until starter doubles in size within 8 hours.
Tips For The Best Sourdough Starter
- Keep starter in a warm location.
- Use unbleached flour when possible.
- Be patient—some starters take longer than others.
- Stir thoroughly during feedings.
- Don’t seal the jar airtight.
Frequently Asked Questions
Why isn’t my starter bubbling?
Cool temperatures or chlorinated water may slow fermentation. Give it more time.
Can I use bleached flour?
Yes! Unbleached flour is preferred, but bleached flour can still work.
How often should I feed my starter?
Daily during creation, then weekly once refrigerated.
Can I use sourdough discard immediately?
Yes! Discard works wonderfully in many baked recipes.