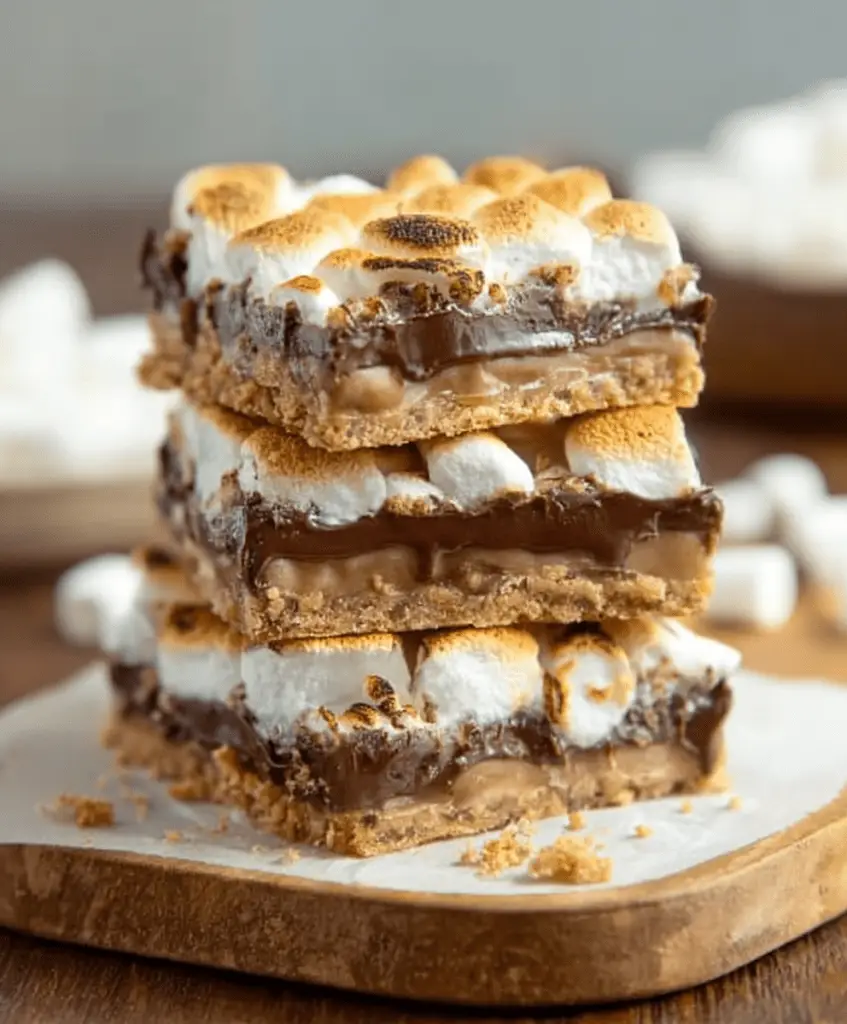
Craving the ooey-gooey goodness of s’mores, but don’t want to build a fire? These easy S’mores Bars capture everything you love about classic campfire s’mores—crunchy graham cracker crust, melty chocolate, and perfectly toasted marshmallows—all in a convenient bar you can enjoy year-round!
Whether it’s a rainy day or the middle of winter, these baked s’mores bars will bring a little summer sunshine into your kitchen.
⭐ Why You’ll Love These S’mores Bars
- Taste just like a classic s’more – No campfire needed!
- Quick & simple – Only 5 ingredients and 25 minutes from start to finish.
- Perfect for parties – Slice and serve for birthdays, potlucks, or cozy nights in.
- Inspired by Starbucks – A delicious homemade twist on their popular treat.
🛒 Ingredients
You only need a handful of pantry staples to make these nostalgic bars:
- 2 cups graham cracker crumbs
- 8–12 tablespoons melted butter (see crust tip below)
- ½ cup powdered sugar
- 4 full-size Hershey’s Chocolate Bars (4.4 oz bars)
- 1 bag mini marshmallows
Tip: Store-bought graham cracker crumbs work best for a fine, even texture. If using whole crackers, crush them very finely in a food processor.
🧁 How to Make S’mores Bars
Step 1: Prepare the Crust
In a mixing bowl, stir together graham cracker crumbs, powdered sugar, and melted butter. Add butter gradually to avoid over-saturating the mixture (see tip below). Press mixture firmly into the bottom of a greased 9×13-inch baking pan.
Bake at 350°F for 5–8 minutes, just until the edges begin to turn golden. The crust will firm up as it cools.
Step 2: Add Chocolate
Lay the Hershey bars on top of the warm crust to cover it completely. Return to the oven for about 3 minutes, just until the chocolate begins to soften and shine.
Step 3: Add Marshmallows
Let the chocolate sit for 1–2 minutes. Then press mini marshmallows evenly across the top.
Switch the oven to broil and return the pan to the oven for 1–2 minutes—just until the marshmallows turn golden brown. Watch them closely! They toast quickly and can burn or catch fire if left unattended.
Step 4: Cool and Slice
Let bars cool completely at room temperature, then refrigerate for easier slicing. Use a sharp knife warmed under hot water for clean cuts (wipe and reheat the knife between cuts if needed).
📝 Tips for Perfect S’mores Bars
- Watch the broiler closely—marshmallows can burn in seconds.
- Crust consistency matters – Slowly add butter until the mixture holds together when pressed, but isn’t wet or greasy.
- For easier slicing, chill the bars in the fridge for 15–30 minutes, then cut with a warm knife.
- Make ahead – These bars are best the day they’re made but still delicious 1–2 days later.
🧊 Storage
Store leftovers in an airtight container at room temperature for up to 3 days. These bars are not ideal for freezing, as the marshmallows may become chewy or rubbery when thawed.
❓ FAQ
How are these different from regular s’mores?
These bars are baked in the oven instead of assembled over a fire, making them mess-free, portable, and great for feeding a crowd.
What chocolate should I use?
Classic Hershey bars give that nostalgic flavor, but feel free to swap in semi-sweet or dark chocolate for a richer twist.
Can I add other ingredients?
Sure! Try layering with peanut butter cups, chopped nuts, or even caramel squares for a fun variation.
🔥 Final Thoughts
These gooey, melty S’mores Bars are the perfect sweet treat to satisfy your cravings any time of year—no camping required. Bring a little summer to your kitchen today and enjoy that classic graham-chocolate-marshmallow combo in every bite!