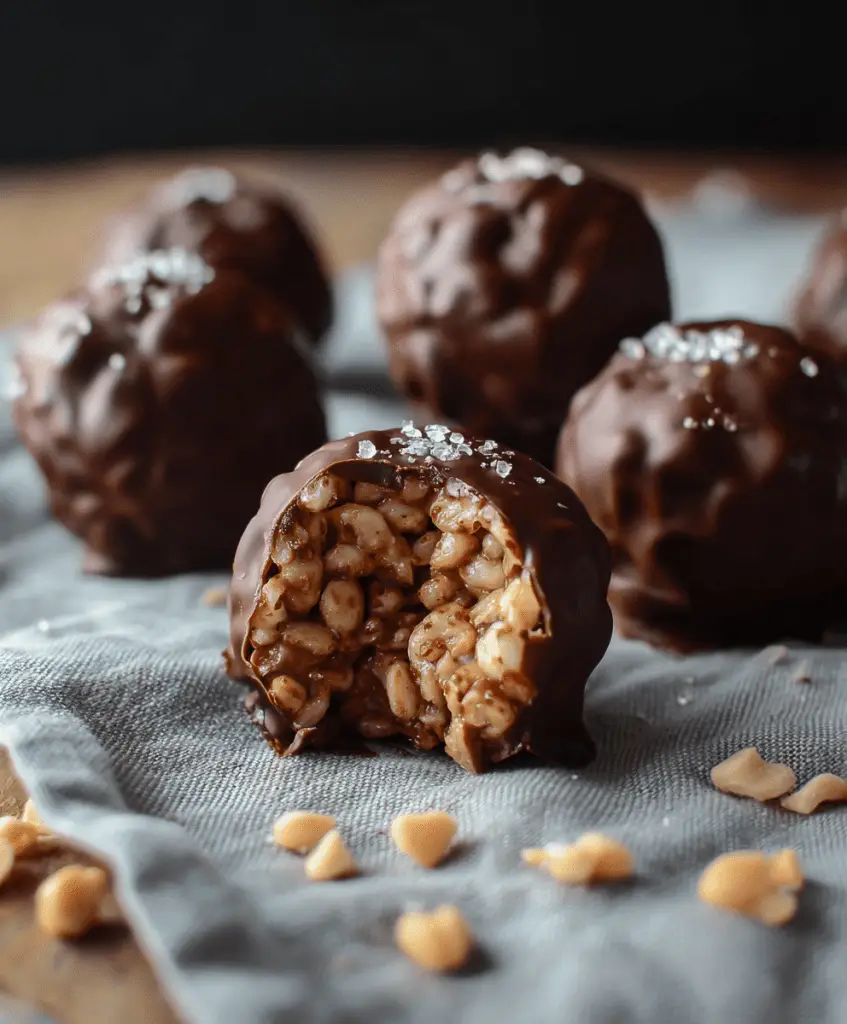
As autumn arrives and the holidays approach, nothing satisfies quite like a homemade sweet treat. These Chocolate Rice Krispie Balls blend creamy peanut butter, rich chocolate, and crunchy cereal into one irresistible no-bake dessert. Whether you’re gifting them, serving at a party, or treating yourself, these bite-sized delights are always a crowd-pleaser.
⭐ Key Highlights
- Quick, no-bake recipe with just 6 pantry ingredients
- Makes 48 sweet, crunchy chocolate peanut butter balls
- Freezer-friendly and perfect for gifting or gatherings
- Easy to customize with different flavors and toppings
🧡 Why You’ll Love These No-Bake Treats
🎁 Perfect for Gifting
Wrapped in a festive tin or tucked into cookie boxes, these chocolate-coated treats make thoughtful and delicious holiday gifts.
🎉 Party-Ready
These mini bites are easy to serve and even easier to love—ideal for dessert tables, potlucks, and cookie exchanges.
⏱️ Make-Ahead Friendly
Prepare in advance and freeze for up to 3 months. Thaw and serve when you need a quick treat!
🍫 Ingredients You’ll Need
| Ingredient | Amount |
|---|---|
| Creamy Peanut Butter | 1 cup |
| Unsalted Butter | 4 tablespoons |
| Powdered Sugar | 2 cups |
| Vanilla Extract | 1 teaspoon |
| Rice Krispies Cereal | 1 ½ cups |
| Semi-Sweet Chocolate | 8–10 ounces (chips or melting wafers) |
Tip: Use high-quality chocolate like Ghirardelli or CandiQuik for a smooth finish.
🥄 How to Make Chocolate Rice Krispie Balls
1. Make the Peanut Butter Base
Melt peanut butter and butter together until smooth. Stir in vanilla extract, then gradually mix in the powdered sugar until fully combined.
2. Add the Crunch
Fold in the Rice Krispies cereal until evenly coated.
3. Shape and Chill
Roll the mixture into 1-inch balls using your hands or a small cookie scoop. Place on a parchment-lined tray and freeze for 20–30 minutes.
4. Dip in Chocolate
Melt the chocolate (add a teaspoon of oil if needed for smoothness). Dip each chilled ball into the chocolate, letting excess drip off. Set them back on the tray to cool.
5. Let Set and Enjoy
Let the chocolate firm up at room temperature or refrigerate for quicker results. Enjoy immediately or store for later!
🧊 Storage & Shelf Life
- Room Temperature: Up to 2 weeks in an airtight container
- Refrigerated: Keeps fresh for 2 weeks
- Frozen: Store in a freezer-safe bag for up to 3 months
To freeze: Flash-freeze the balls for 20 minutes before transferring to a bag.
✨ Creative Variations
🎨 Topping Ideas
- Crushed peanuts or graham crackers
- Holiday sprinkles or edible glitter
- Shredded coconut or extra cereal coating
🍫 Chocolate Options
| Chocolate Type | Flavor Note |
|---|---|
| White Chocolate | Sweet and creamy |
| Milk Chocolate | Smooth and slightly sweet |
| Dark Chocolate | Bold and bittersweet |
🥜 Dietary Swaps
- Use almond, cashew, or sunflower butter for allergy-friendly alternatives
- Try sugar-free chocolate chips or natural sweeteners for lower sugar
📝 Final Thoughts
These Chocolate Rice Krispie Balls are a simple yet impressive treat. With just a few ingredients, no baking required, and endless possibilities for customization, they’re perfect for every occasion—from holiday gifts to late-night cravings.
So grab your mixing bowl and make a batch (or two)! You’ll be amazed how quickly they disappear.
❓ FAQ
Q: Can I use a blender or hand mixer instead of a food processor?
A: You don’t need one! A bowl and spatula work fine since there’s no cooking involved.
Q: Can I double or halve the recipe?
A: Absolutely! This recipe is easily scalable based on your needs.
Q: My balls fell apart—what went wrong?
A: Add more powdered sugar or chill the mixture longer before rolling.